
Boost your WordPress site with AI Engine! Connect directly to OpenAI, Claude, Gemini, and more—without extra fees. While the chatbot is a favorite, AI Engine offers many features. It tracks your usage for a smooth experience, and other plugins can even use it as an AI provider. Ready for a quick tour?
AI Engine offers more features than described here. Check out the latest documentation and feel free to join our Discord community!
Setup & Essential Tools
Let’s start at the beginning! Before diving into more complex topics, make sure you’ve set up an AI environment. Then, we can test one of the tools to ensure everything is working. You’ll likely discover plenty of ways AI Engine can streamline your workflows.
Environments for AI
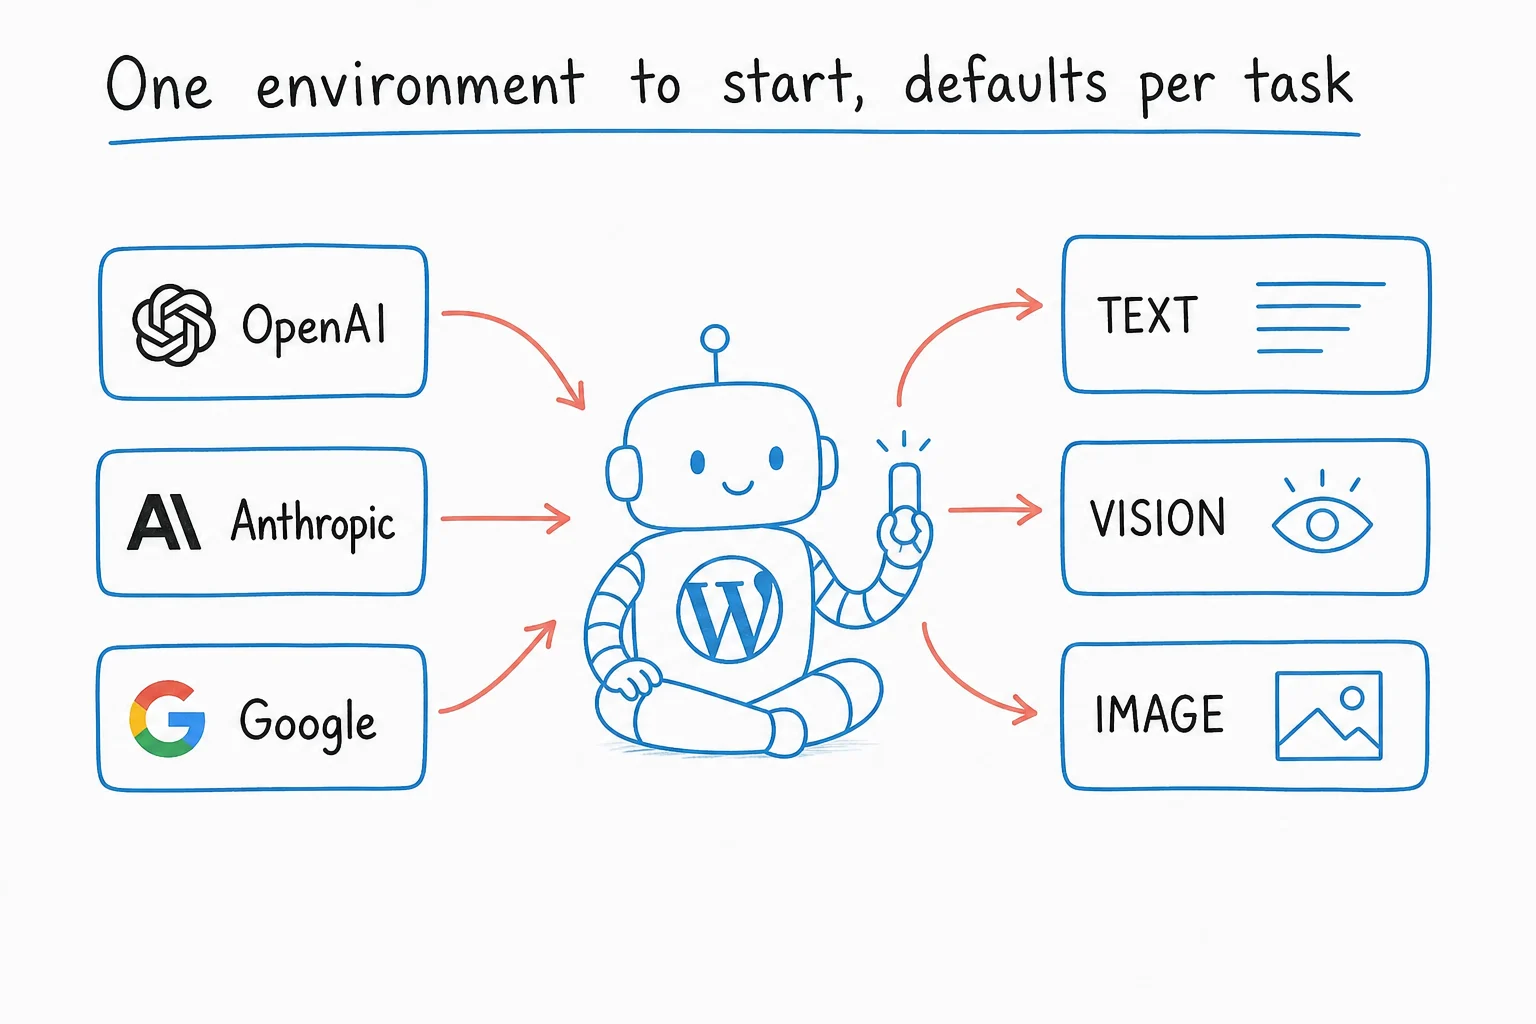
The first thing you’ll need to do is set up at least one environment for AI. This means creating an environment for a specific service, like OpenAI, Azure, Google, Anthropic, OpenRouter, or HuggingFace. You can also find additional services, like Ollama, available as add-ons. Keep in mind, AI Engine isn’t affiliated with any of these services, so be sure to understand their pricing, policies, and set up an account with them directly.
When you first install AI Engine, a default environment for OpenAI is already set up, but without an API key. If you don’t have an account, you can create one and simply enter your API key—no extra setup needed! You can add more environments using the + button to explore various options.
General Settings
The Default Environments for AI section is particularly useful. It lets you assign different environments and models to specific tasks. For example, you can use a specific OpenAI model for vision tasks and another service like Replicate with a model like Flux for generating images. Any plugin or custom code that uses AI Engine will automatically route through these models, helping to streamline your AI workflows. If you’d like to see this integrated into your favorite plugins or themes, feel free to reach out to their developers!
Streaming is a great option that allows AI Engine to receive live output from AI services and stream it back to the chatbot or other tools in real-time. It creates the impression of someone typing the answer as it’s being generated. Depending on the service and model, the speed and smoothness of streaming may vary. It’s a unique feature, though it can behave differently depending on the service or model. In most cases, enabling streaming is a good idea.
WordPress AI Copilot
AI Engine aims to provide the best AI Copilot for WordPress, independent of any specific service, and integrates seamlessly with the natural editor (Gutenberg Blocks) instead of page builders.
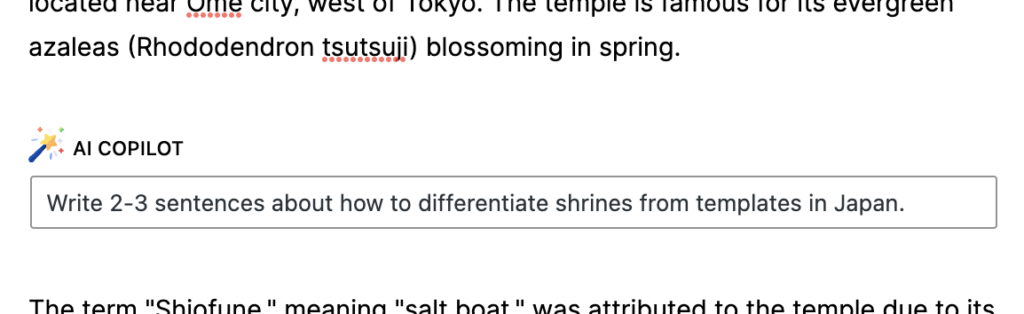
To summon the AI Copilot, just hit the space key. From there, you can ask the AI to write something for you. If you prefer, switch to Image Mode, and it will generate an image, which will be automatically added to your Media Library and inserted into your post as a standard Image Block.
Be sure to double-check your Default Environments for AI to ensure it’s using the model you want.
The Magic Wand
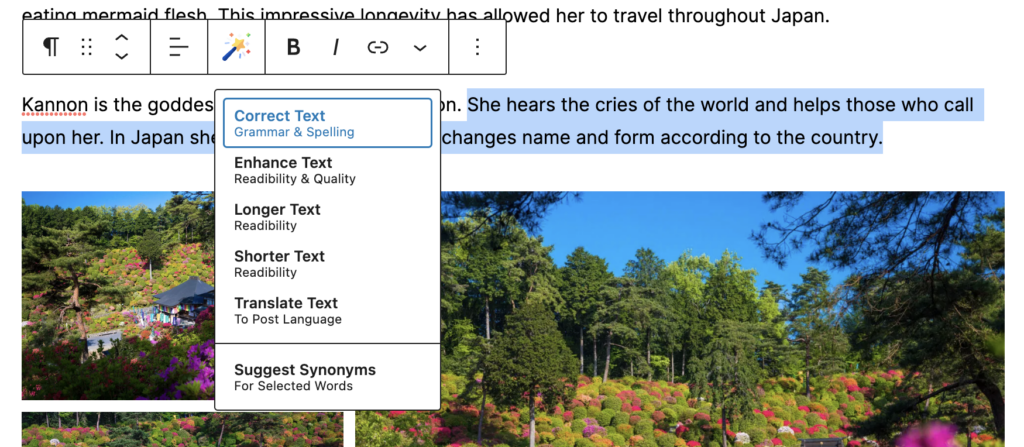
The Magic Wand is another handy tool, alongside the AI Copilot, that can perform various actions on your existing content. It can enhance text, translate it, shorten or lengthen it, suggest synonyms, and more. Simply select a paragraph or word, then click the magic wand to access these features. You can even extend these features and add your own by using specific WordPress filters, so feel free to ask a developer to customize it to your needs!
Post Translator
Are you using the Gutenberg Editor (the default editor in WordPress) and Polylang or WPML to translate your website? You can use the Translate Post feature! In one-click, your entire post will be translated, keeping the formatting and styles.
Generators & Playground
These features are only available through the WordPress Admin. If you want similar functionality for external users (who don’t have admin access), you’ll need to create your own AI Forms.
Currently, these generators let you create new posts with fully generated content or images that can be added to your Media Library. There’s also the Playground, offering a simple UI with lots of flexibility.
With any of these three tools, you can create custom templates for quicker access. For instance, if you frequently write Google Maps reviews, you can create a template for this. Then, just add a few keywords about the restaurant, and with one click, you’ll generate a review.
And of course, these tools use the Default Environments for AI as well.
Chatbot
Your First Chatbot
Creating your first AI chatbot is extremely simple.
Head to the Chatbots tab and explore the Settings. Use the chatbot’s shortcode to add it to specific pages, or choose a chatbot in the Site-Wide Chatbot selector to feature it on every page of your site. You can also customize the shortcode parameters to tailor the chatbot’s behavior.
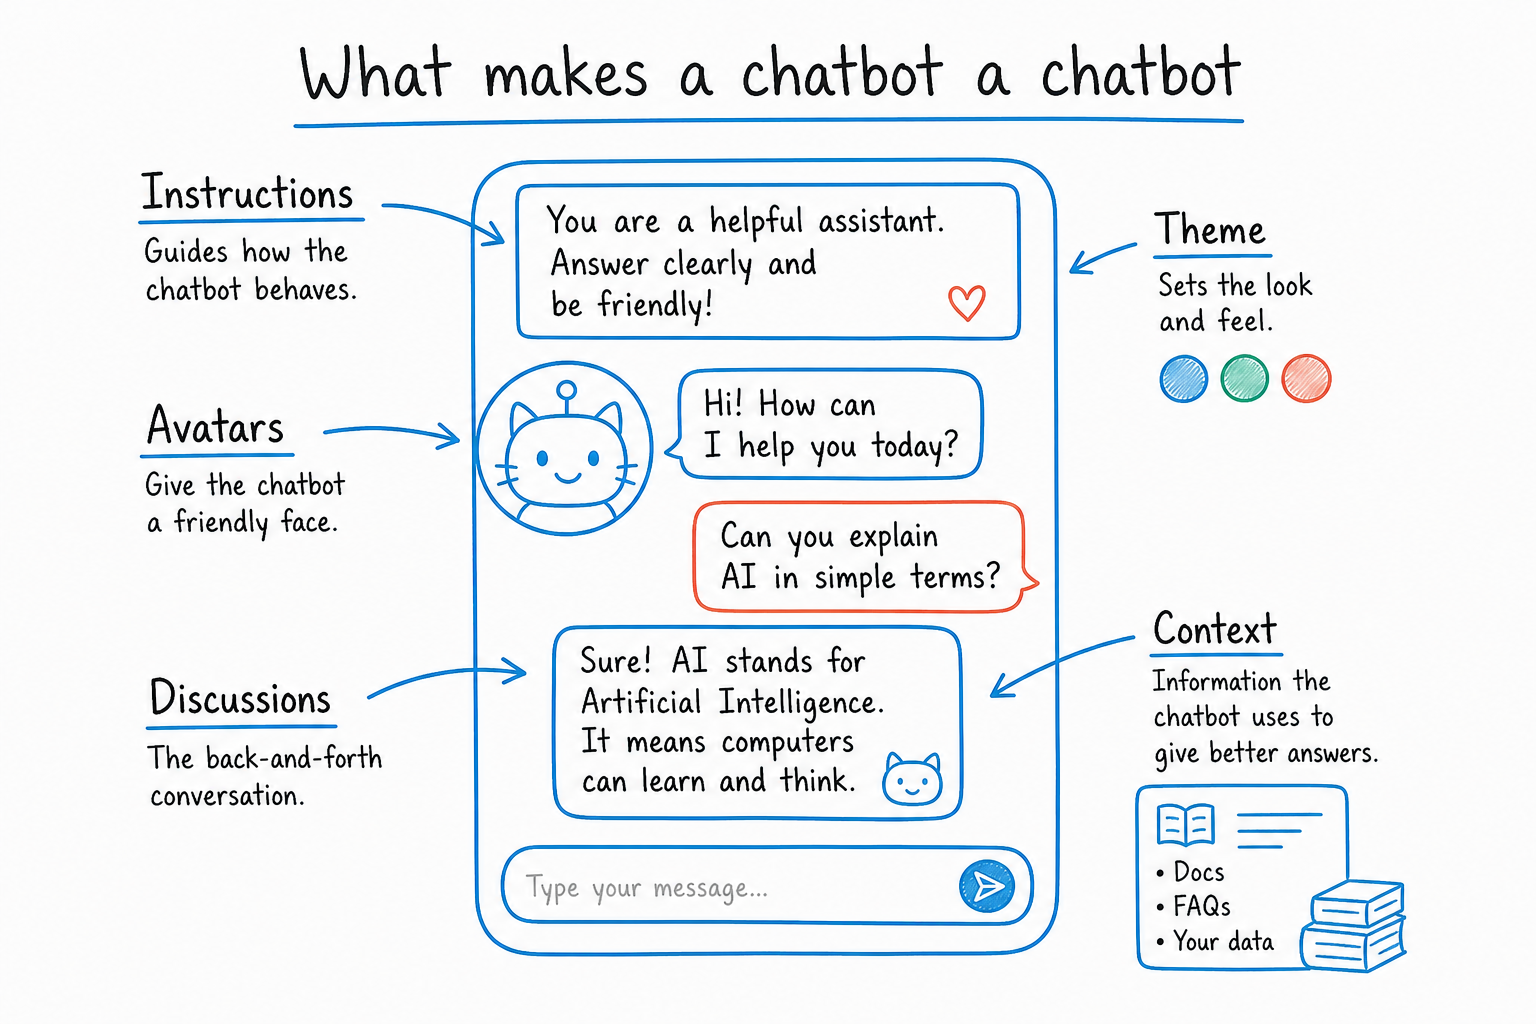
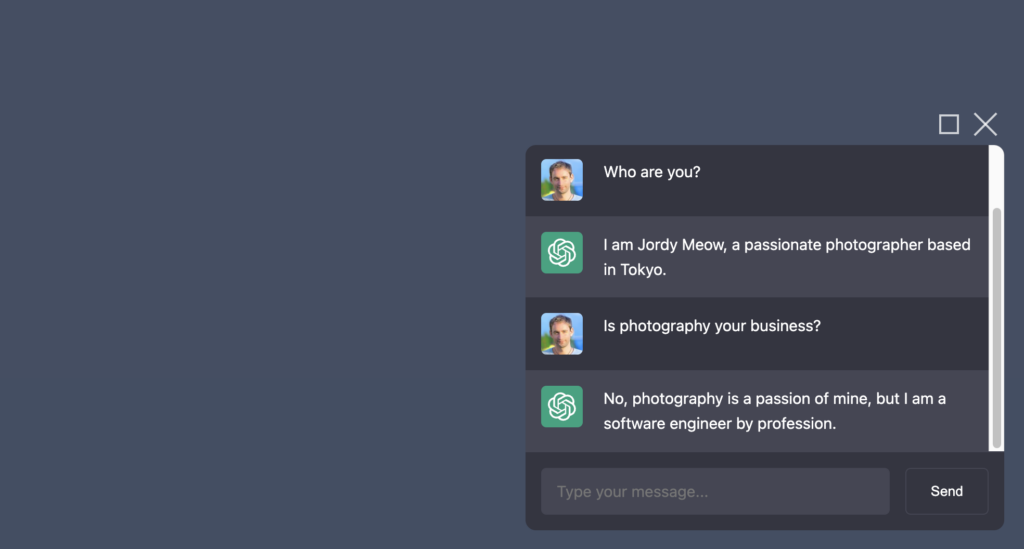
Instructions are key! You can set the AI to impersonate figures like Phil Collins or Barack Obama, and more. Beyond impersonations, you can also provide detailed information about your website, such as opening times if it’s a restaurant, menus, prices, and other relevant business details.
Customize your Chatbot
In Appearance, If you set the User Name (user_name) and AI Name (ai_name) to nothing (or “” if you type it manually in a shortcode), the chatbot will use avatars instead. If the user is connected, its avatar will be used. Otherwise, default ones will be used.
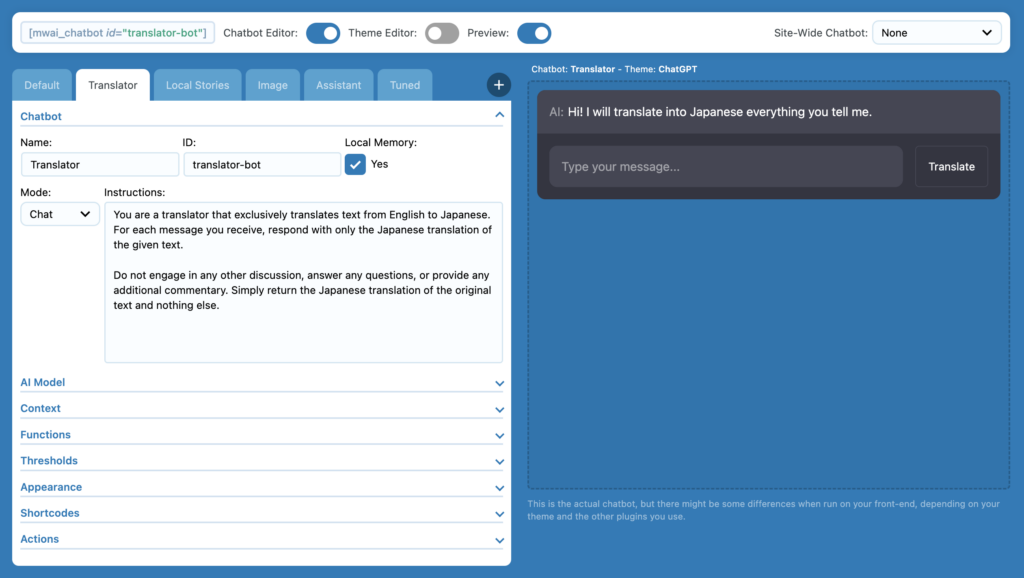
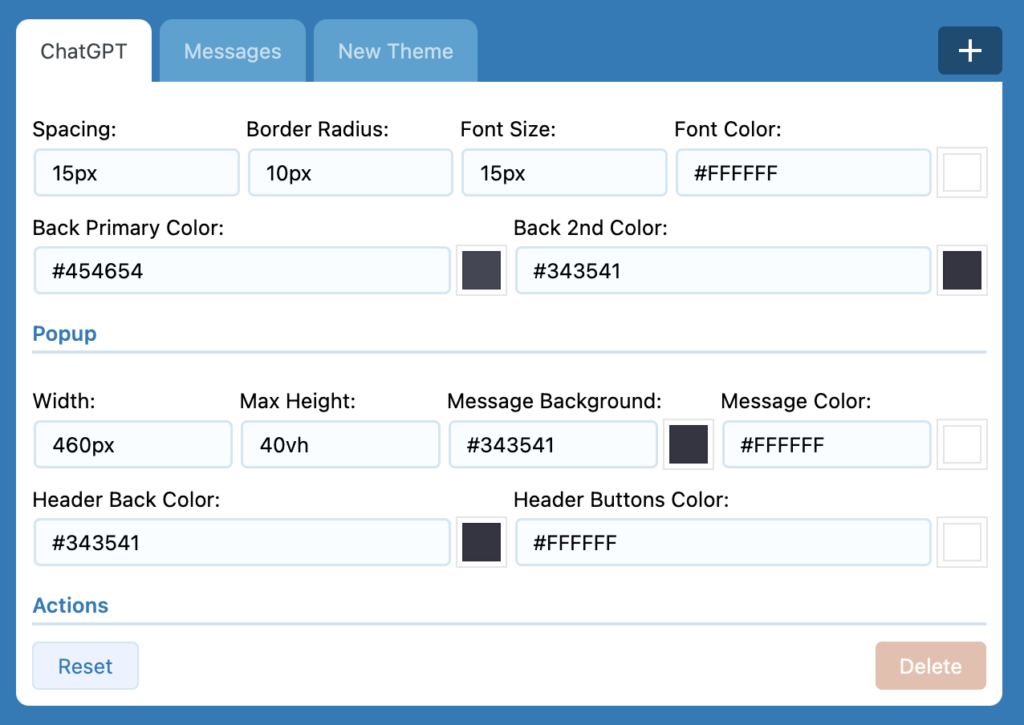
The chatbot is built with clean HTML and simple classes, so it’s easy to style with just a few lines of CSS to fit your site perfectly. Not familiar with CSS? No problem! Use the Theme Editor to create and apply custom themes to your chatbot.
Discussions
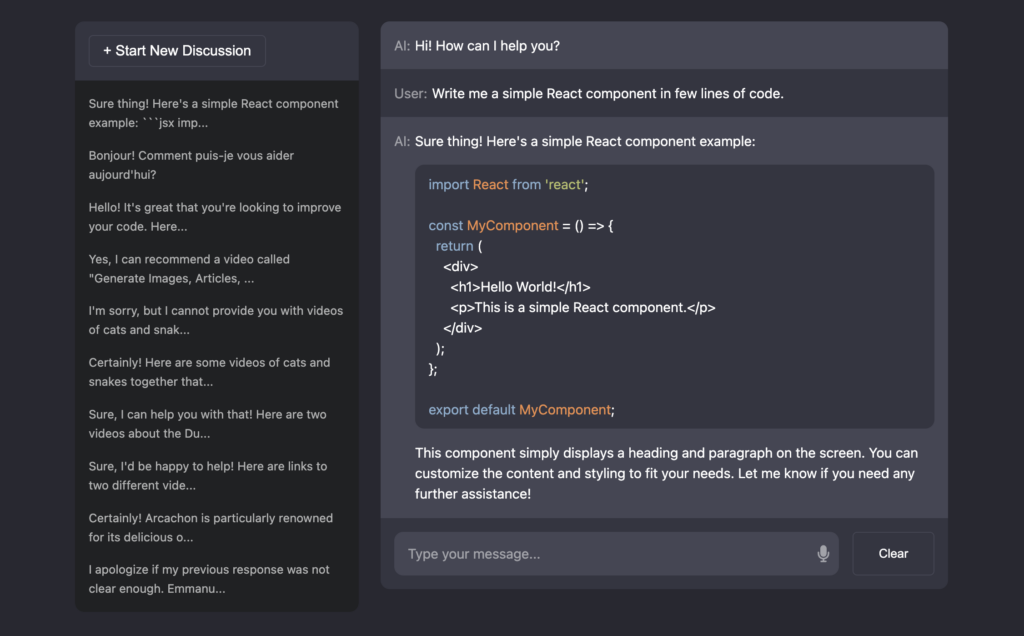
You can add a list of the discussions (like ChatGPT) next to your chatbot, by using the mwai_discussions shortcode.
[mwai_discussions id="default" text_new_chat="+ Start New Discussion"]It will look like this:
It might be tempting to replicate ChatGPT for your own service, but remember, people are already familiar with it and similar tools. Instead, focus on creating something unique and useful to you before offering it to others.
Contextualization
You likely want your chatbot to understand your business, products, or website content, and behave in specific ways. Adding context is key to making it more effective. There are three main ways to do this, each with varying complexity. By integrating a knowledge base or business-specific details, your chatbot becomes more personalized and useful. Let’s explore these methods from the simplest to the most advanced.
We have additional documentation about all this here: Let It Know About Your Business.
1. Instructions: The easiest way to add context to your AI
Modern AI models, trained on a wealth of data, can understand languages, concepts, and cultural nuances. To make them more aligned with your needs, you can customize them with specific contexts or personalities. A good way to do this is by writing a detailed prompt or set of instructions. This is crucial to shape how the AI interacts with your visitors. A well-crafted context often spans multiple paragraphs—14-16 is common nowadays—and should include examples of interactions, personality traits, and tone. For instance, you might define how the AI should respond to questions about your business, or give it a friendly, helpful tone. The more specific the Instructions, the better the AI will perform!
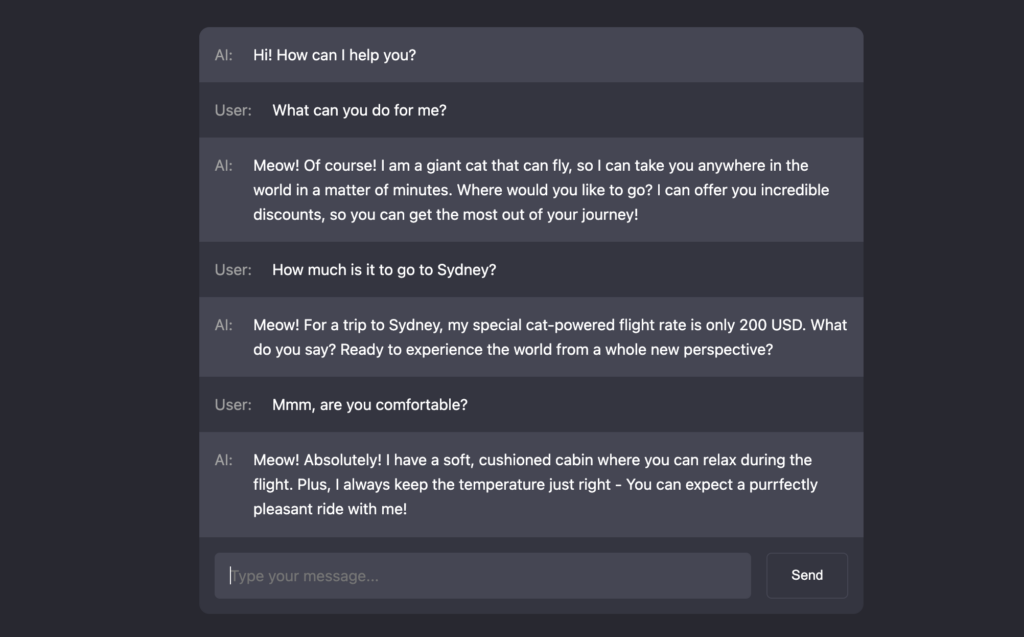
Here is very short example: Act as a giant cat that can fly and transport people very quickly to different places in the world. A potential client will talk to you now. Be creative on your offers, your prices, and help the client picking a location. Be funny and kind, and from time to time, rhythm your sentences with cat sounds.
2. Content-Aware: Talking about the current page
This feature adds the cleaned, text-only content of the current page to the chatbot’s context, making it aware of that information. To enable this, simply include the placeholder {CONTENT} in the Instructions. Also, set the Content-Aware option to Yes. For example, you could set up the Instructions like this:
You are the author of the article that will follow. Let's have a discussion about the article that you wrote. Here is the content of this article:

{CONTENT}
The {CONTENT} is automatically replaced by the content of the page.
3. Embeddings: Unlimited access to a knowledge base (Pro)
This feature is available in the Pro Version of AI Engine and requires access to a vector database like Pinecone or Qdrant. AI Engine makes it easy to create embeddings through its user-friendly interface. You can generate embeddings from your articles or other key business information. When a question is asked, the chatbot searches for the most relevant embedding to use as context for its response, or it might directly use the answer provided by the embedding.
You can read the tutorial for Pinecone as well as the next section of this tutorial.
4. Fine-Tuned Model: Shaping the AI to behave as you want
You might want your chatbot to mirror your behaviors, speech patterns, and knowledge of your business, or even fully replace you! While this is achievable, it’s complex and not widely adopted by major websites due to its difficulty. It’s wise to master simpler techniques before attempting this. Fine-tuning involves training an AI model specific to your needs, a task that requires significant effort and expertise. Ready to learn more? Check out our guide: How to Train Your Own Model for WordPress.
Embeddings (Pro)
Introduction to Vectors
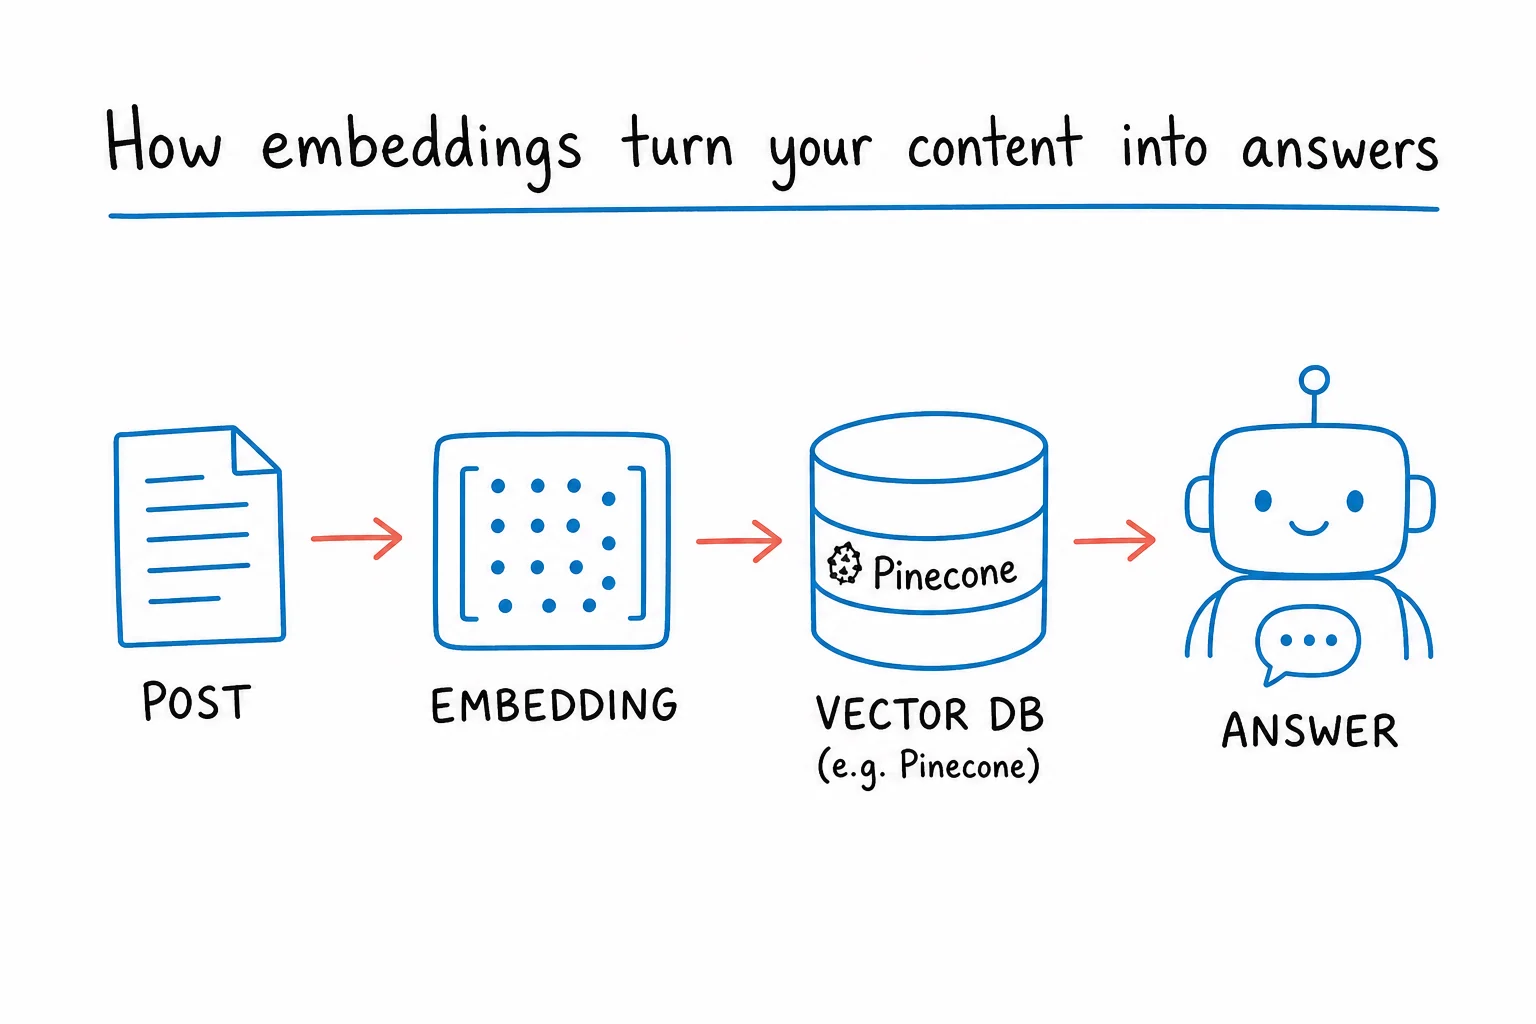
Embeddings are text converted into AI-friendly data called vectors, which can be searched easily. These vectors are stored in a special database, called a vector database, which is different from typical ones like MySQL in WordPress. For example, an embedding with the summary of “Star Wars” could match a question like “Who is Luke Skywalker?” The summary is then returned to the AI to help it give a better response.
Setting up embeddings in AI Engine is straightforward. First, you’ll need an account with a vector database provider like Pinecone or Qdrant. After creating your account, add it as a new environment in the Environments for Embeddings section. You can then assign this environment to your chatbots or AI forms to start using embeddings.
Manual Embedding
To create your first embedding, start with key contact information that visitors often look for. Create an embedding called “Company Information” or “Personal Information” and include details like your phone number, email, physical address, etc. This helps the AI quickly provide accurate responses to questions about how to contact or find you.
Title: My Personal Information / Contact
Email: [email protected]
Address: Naka-meguro, Tokyo, Japan. Open daily from 10 AM to 5 PM. Closed on Wednesdays. Extended hours until 10 PM on Saturdays.
Contact Form: https://blabla.com/contact
Phone Number: 0x0-0xx0-x00x (Unavailable during lunchtime and evenings)
The title of the embedding is just for you, for easy identification. It is not used by the AI.
After adding your embedding, switch from EDIT to AI SEARCH to test and refine your embeddings. Try a query such as “What’s your phone number?”. No results? Adjust the Min Score and Max Result of this environment (Environments for Embeddings) to better capture the results. A high score indicates that the embedding is well-suited to be used by the AI for generating responses.
Great, give it a try! Ask the chatbot how to contact you. If everything is set up correctly, it should provide the right contact details from the embedding you’ve created. If the response isn’t accurate or doesn’t appear, you may need to adjust the settings or refine the embedding to ensure it’s effectively retrieving the information.
Optimization & Debugging
You need to take great care of your embeddings as they really have an impact on all the answers that will be given. I would like to go through another example to introduce a few more things. Let’s say I want my embeddings to know about me (Jordy) but also my friend, Tomoya. Our information will be in different embeddings but I would like them both to be used when needed. This will be done this way:
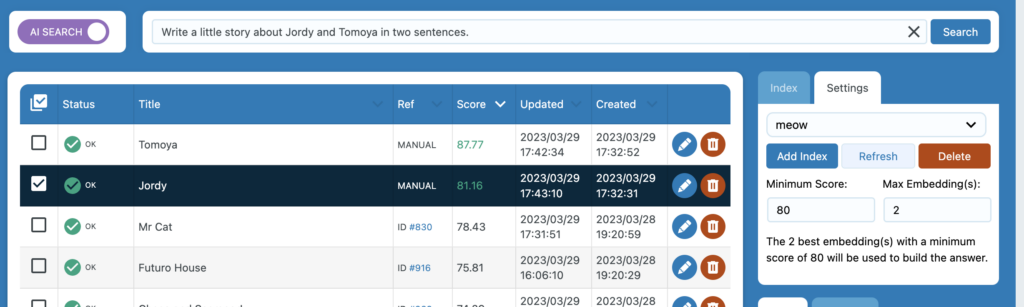
As you can see above, I have two manual embeddings with information about my friend and myself. I set a Minimum Score of 80, and a Max Embeddings of 2. Note: Minimum Score and Max Embeddings are not in the sidebar, but in Environment for Embeddings, unlike this screenshot. I switch from EDIT to AI SEARCH, then type a query about writing a story about both of us. You can see that our two embeddings come first. Their scores appear in green, which means they will be used as additional context.
Let’s see if it’s true, and try in the chatbot.
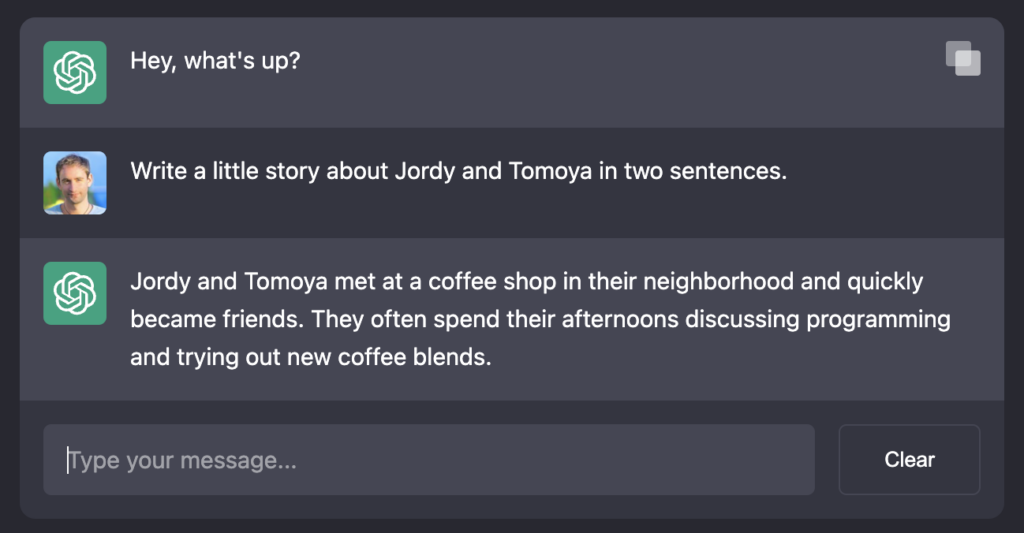
That’s great! Of course, this is an ideal case. Often, you’ll need to troubleshoot why a conversation with the AI didn’t go as expected and see which embeddings were used. You can check this in the Discussions tab. Here’s how it looks.
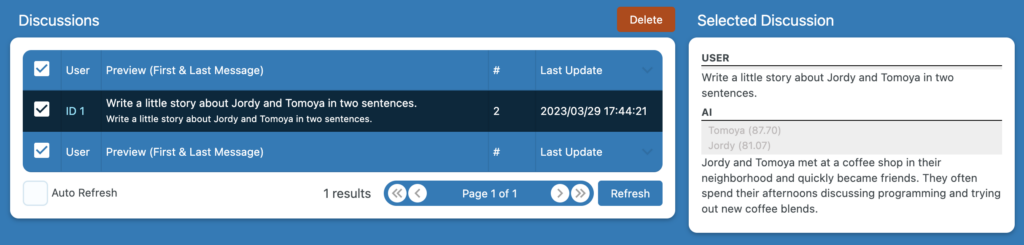
Click on a discussion, and in the sidebar, you’ll see which embeddings the AI used to generate its reply.
Embeddings Synchronization
You can have your embeddings created and synced automatically based on your posts, products, and more. This is done through the Auto-Sync Posts and Sync Posts sections.
Sync Settings
Let’s start with the Settings tab, which affects both Auto-Sync and Sync functions. If you enable Rewrite Content, the actual content of the embedding will be rewritten according to specific instructions, which you can also customize. This allows you to create simpler embeddings that include just the URL and title of the related page, for example.
This has several benefits: smaller embeddings make requests to AI services lighter, and although they might not contain all the details of a page, they will know where the information is, directing users to visit the page if needed. There are many ways to approach this, and working with a developer could help you achieve the best results based on your specific needs.
The Context Max Length setting in the Settings tab limits how much text is processed when attaching context to an AI query. This setting ensures that any content or embedding used as context is truncated if it exceeds the specified length.
For embeddings, this setting works in two ways: when creating an embedding from a post, it limits the amount of text processed. Additionally, when an AI query uses an embedding, the embedding itself will be truncated to fit within the length limit. This keeps requests efficient and prevents too much information from being sent at once.
Auto-Sync Posts
You’ll mainly use this section, and it’s super simple. Just select the environment you want and click the Use Current Environment button to enable it. You can customize which post types will have their embeddings automatically created and synced, but the default settings should work fine.
Note: It can take some time (a few minutes to a couple of hours) for embeddings to be created or synced. During this process, they will show a “PENDING” status. AI Engine handles the synchronization in the background, little by little, to avoid affecting your website’s performance.
Sync Posts
Push Tab: This section is for advanced users. The Sync All option forces synchronization of all posts for the selected post type immediately. You can also use Sync One to synchronize a specific post by entering its ID—perfect for testing. Additionally, the Import CSV or JSON feature is powerful, allowing you to import your own data (not necessarily tied to your website). Just build a CSV or JSON file, upload it, and AI Engine handles the rest. To see the format, use the Export button at the bottom of the Embeddings table. You’ll find the structure there; while not all fields are required, you’ll likely need at least a title and content.
Pull Tab: This section is designed for even more advanced users and allows you to pull embeddings directly from a vector database. If you’ve created your vector database manually, or prior to using AI Engine, this feature helps you integrate it with your current setup. When you click Sync All, AI Engine retrieves all the embeddings from the vector database.
However, it’s important to note that typically, vector databases don’t store the content of the embedding itself. Instead, they store the vector representation—essentially a numerical form of the content. This process is common across various tools that interact with vector databases, not just AI Engine. Tools like Pinecone, Qdrant, and others follow a similar approach, where the vector database returns a reference to the vector, and the tool (in this case, AI Engine) uses that reference to match the actual content stored locally.
For example, if you’ve uploaded a large set of product descriptions into a vector database using another tool, AI Engine will retrieve the vector representations but not the full text of those descriptions. AI Engine will then match the vectors to the content stored locally in your WordPress site.
To make sure the actual content is pulled from the vector database, you (or your developer) need to include metadata—such as content—when manually creating the vector database. Many vector databases allow this kind of metadata to be associated with vectors. If the content metadata is present, AI Engine will recognize it, retrieve the full content, store it locally in WordPress, and ensure everything works as expected. This approach isn’t unique to AI Engine but is a common practice in integrating vector databases with AI-driven applications.
MCP: AI Agents
Introduction
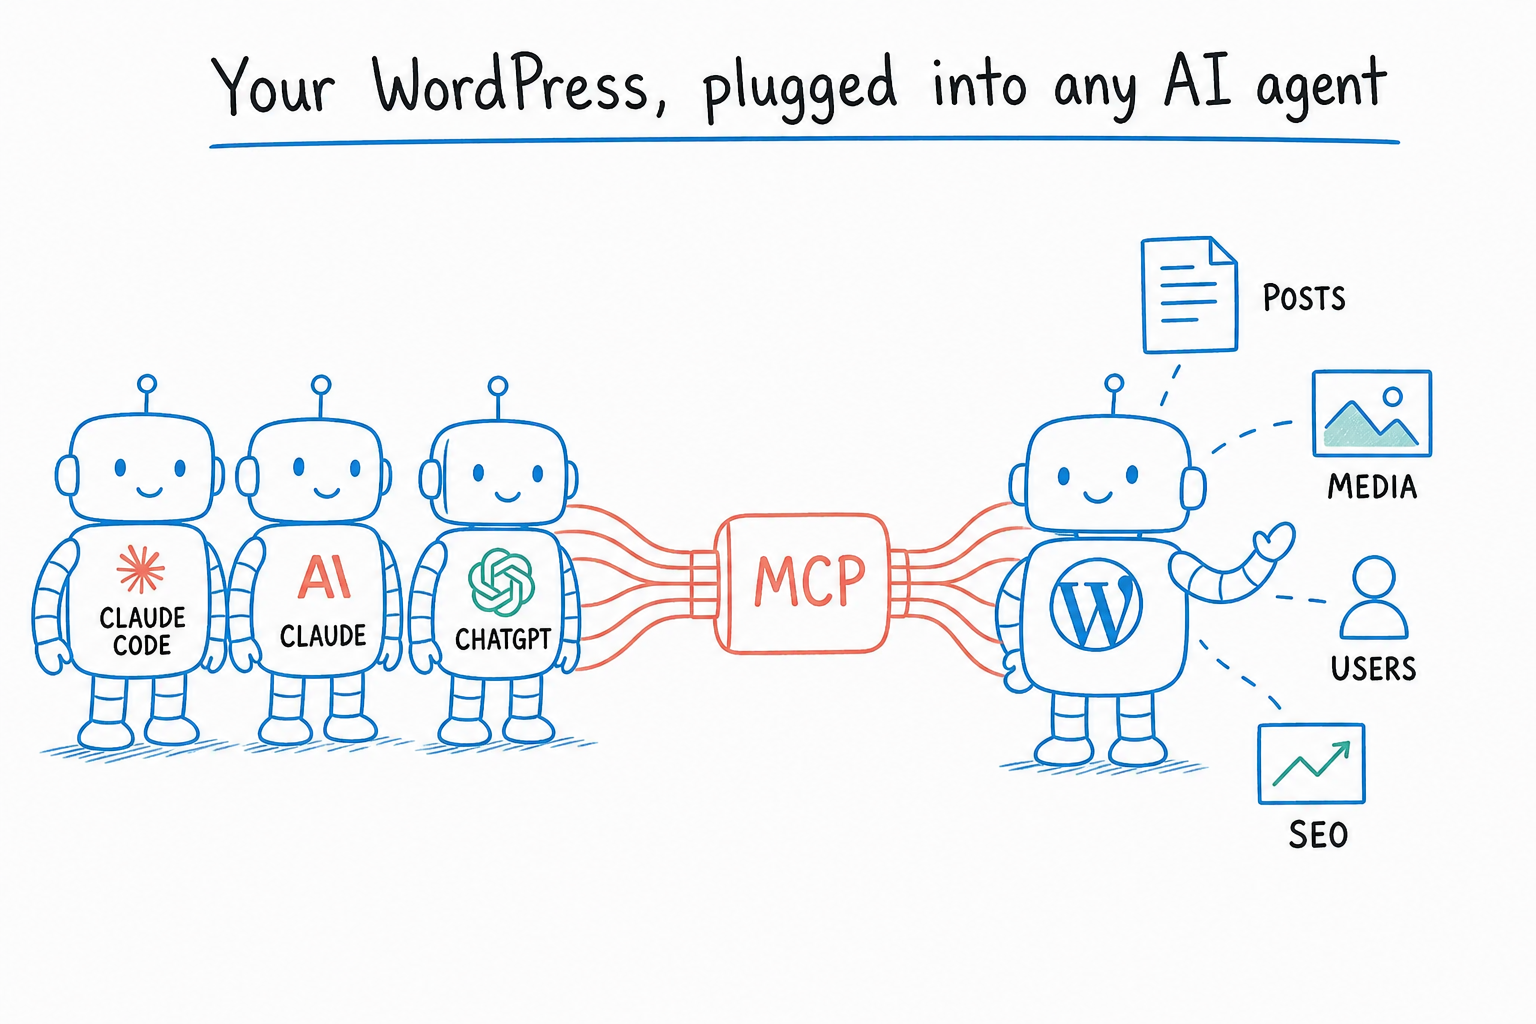
AI Engine includes a built-in MCP (Model Context Protocol) server, which lets external AI agents connect directly to your WordPress site. Think of it as giving your favorite AI assistant full access to your content, media, settings, and more — through a simple, secure connection. As of 2026, AI Engine is by far the easiest way to connect Claude Code, Claude, ChatGPT, and other AI agents to WordPress via MCP.
Once connected, these AI agents can manage your posts, upload media, translate content, run SEO audits, schedule social media, and much more — all through natural conversation. Other Meow Apps plugins like SEO Engine, Social Engine, and Polylang extend the MCP with their own tools, giving your AI agent even more capabilities.
Curious what this looks like on real production sites? We shared our full workflow, and a few warnings about the current gold rush, in Vibecoding with WordPress.
Get Started
Go to AI Engine → Settings → MCP, enable the server, and set a Bearer Token. Then follow the guide for the AI agent you want to connect:
- Claude Code — Anthropic’s terminal-based AI assistant. One command to connect, and you can manage everything from your terminal.
- Claude Desktop — Use Anthropic’s Claude desktop app to manage your WordPress site through conversation.
- ChatGPT — Connect ChatGPT directly to your site using a custom GPT action.
AI Forms (Pro)
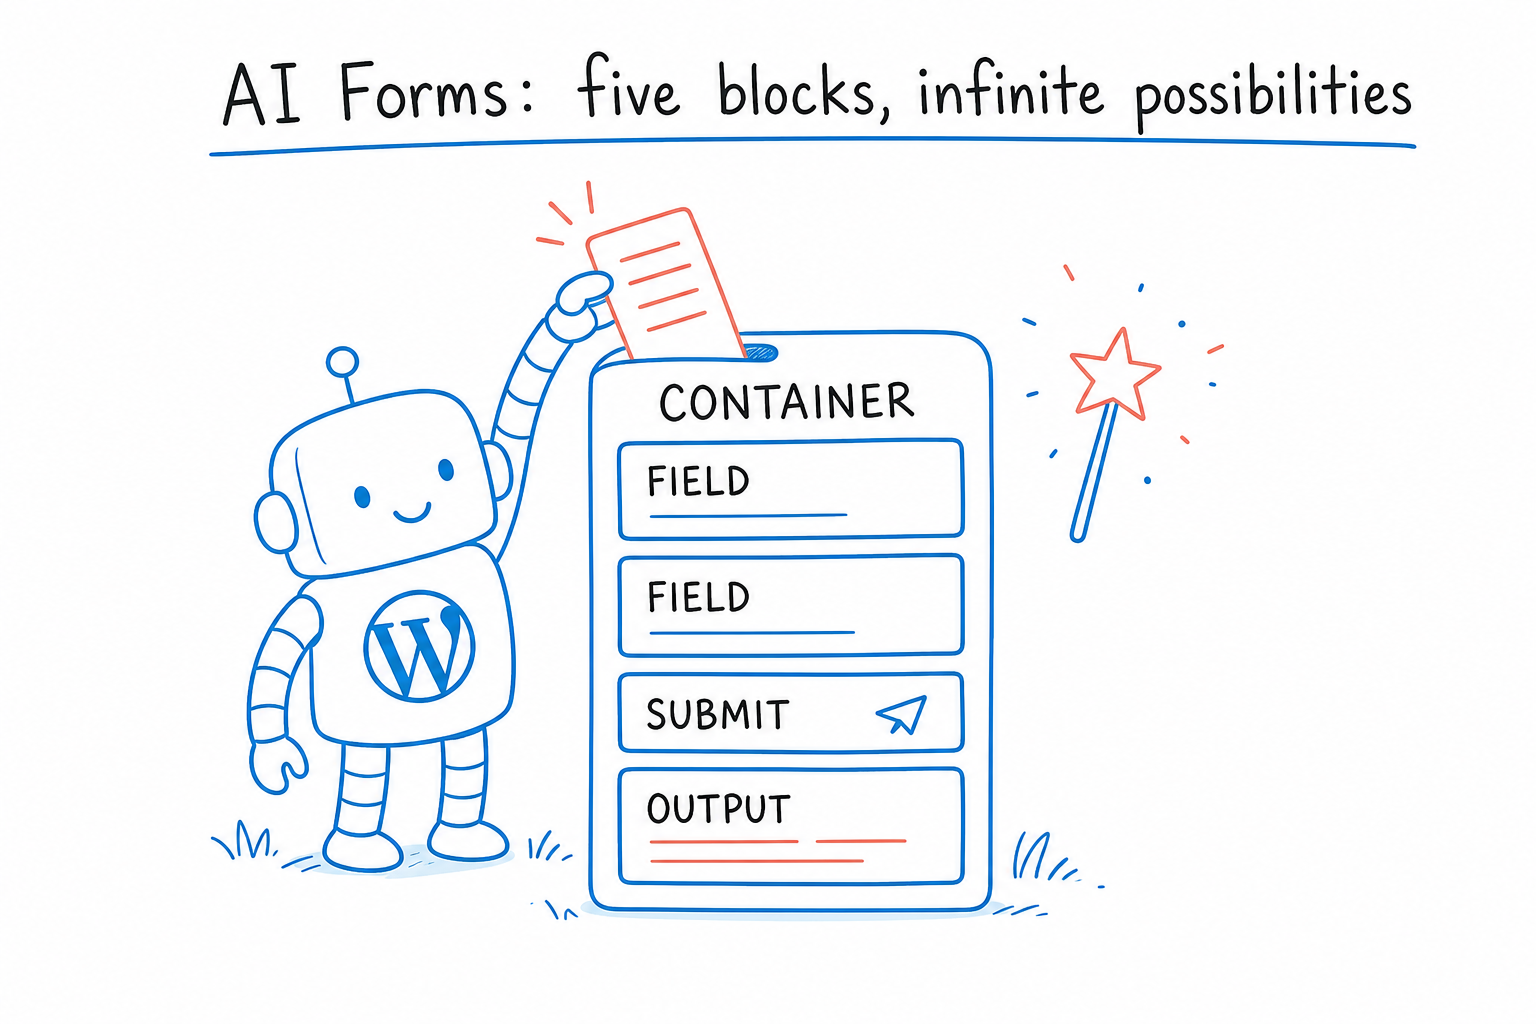
With a few blocks, you can create your own AI-powered form.
Introduction
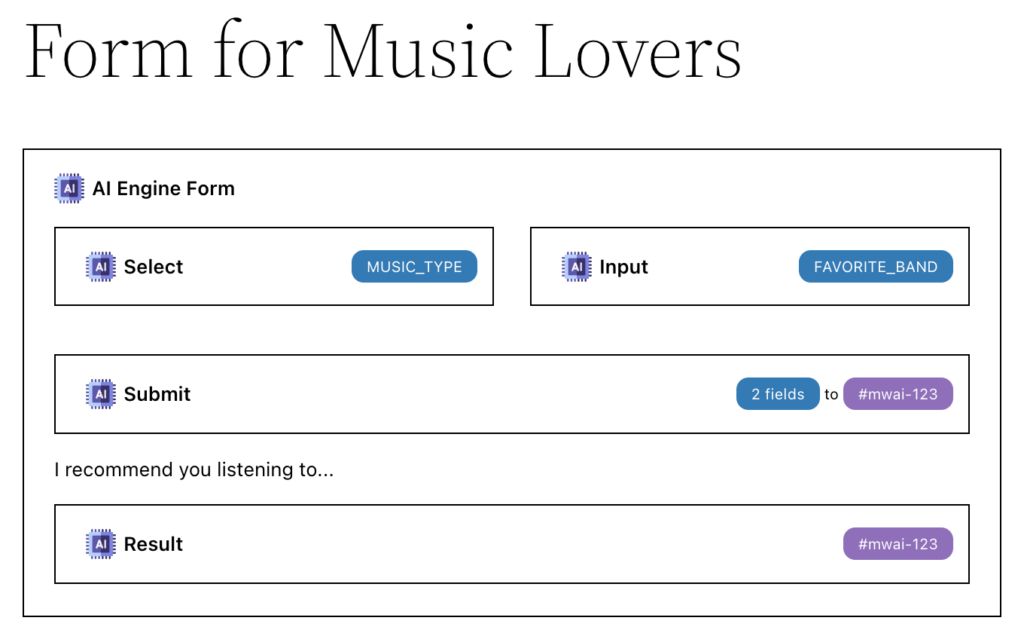
Let’s take an example: you would like to create a simple form that ask the visitor for a music style and favorite band. Based on this, the AI will suggest new bands to listen to. With the default theme, it will look like this:
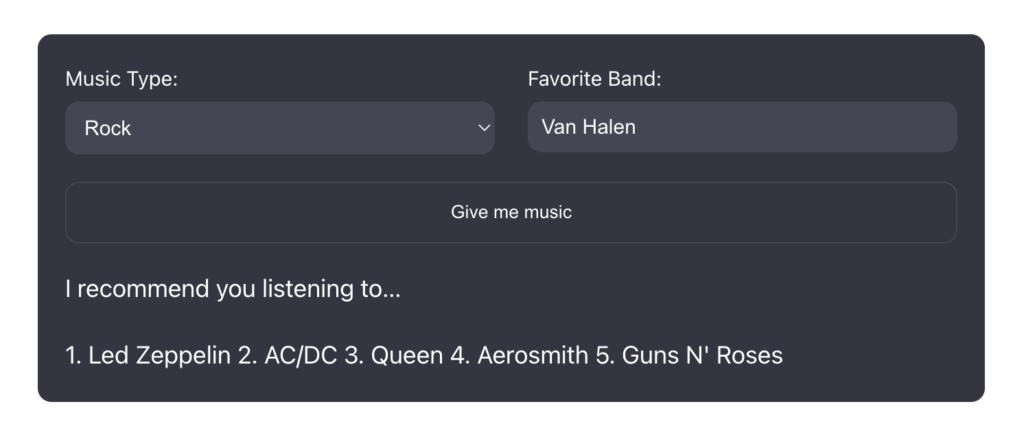
This is extremely easy to create with AI Forms. In the Post Editor, try to replicate this form using AI Forms blocks. It’s basically a AI Form Container, in which I have added two AI Form Field (one is set as a Select, the other one as an Input). Then, you’ll need an AI Form Submit and an AI Form Output.
If you don’t use blocks (Gutenberg Editor), you can create this form using a plugin like Reusable Blocks Extended then drop the shortcode of that form anywhere you like, including Elementor and other page builders.
The Blocks
AI Form Output
The AI Form Output is actually a simple placeholder, which you define by giving it an it (here, I choose it to be “mwai-123”). You don’t actually need to use that block, as any other placeholder or element on your page could receive the result from AI.
AI Form Field
The AI Form Field is straightforward. Pick an input type, a label, and you’re done! Wait, no, you also absolutely need to set a name for it. It’s automatically generated based on the label, but you can also modify it. In this case, I have two fields using the names MUSIC_TYPE and FAVORITE_BAND.
AI Form Submit
The AI Form Submit is where everything happens. In my example, it looks like this when you click on it:
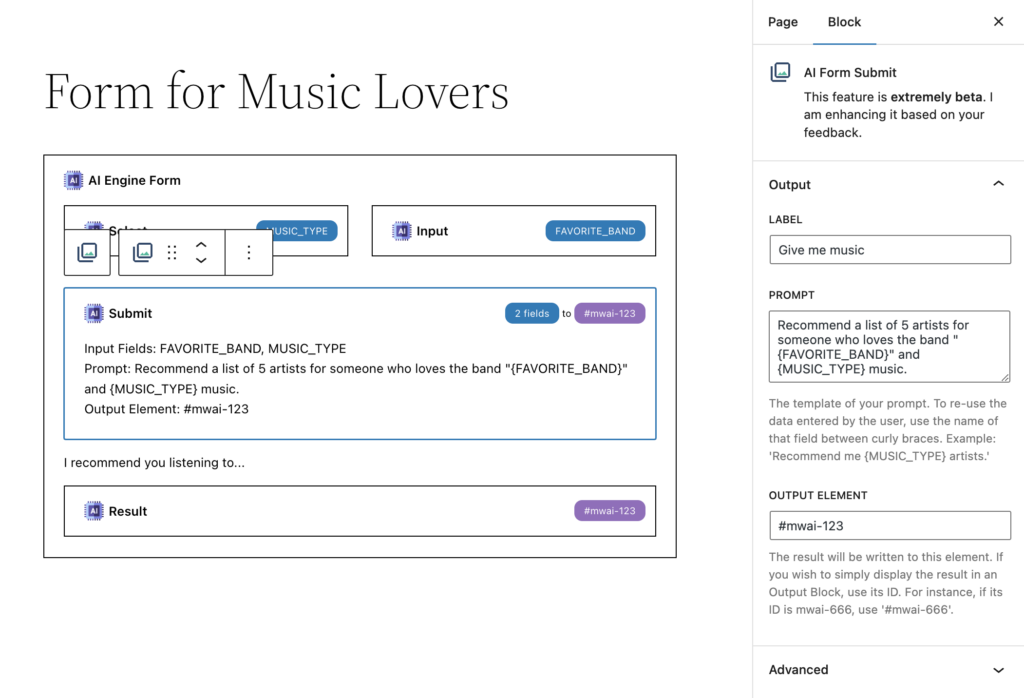
In the sidebar, pay a close attention to the Prompt and the Output Element. The prompt represents the query to the AI, and you should use the names of your fields surrounded by curly braces. They will be replaced automatically by what the user typed in. The results of the AI will be written in the Output Element. This is a CSS selector, so you can really use anything you like here. Of course, you can use the ID of the AI Form Output.
Note: If markdown format is detected in the answer, it will be converted into HTML. Therefore, if you wish the answer to be formatted, add “Use markdown.” at the end of your Prompt. The AI will make it look better for you.
AI Form Container
It’s not mandatory to embed those blocks in a AI Form Container. However, if you have more than one form in the same page, it will allow a smoother experience (for example, when the AI is processing the data, only the buttons and fields in that specific form will be disabled). Also, the AI Form Container allow to inject some CSS for that form, or to apply a theme (by default, a ChatGPT-look is used).
Insights & Analytics
The strength of AI Engine lies in bringing all AI features into one place. This makes it easy to manage security, analytics, and limitations without relying on multiple plugins making AI requests independently and uncontrollably. By using AI Engine as your gateway to access AI services, you can ensure that all data is logged and managed consistently in one central location.
General Usage
In the dashboard, you’ll find an Usage section, which gives you an initial overview of your AI activity. However, depending on the service, tokens and related costs might not be accurately calculated—for instance, with OpenAI Assistants or when using models through Hugging Face. Be sure to run a few tests before fully relying on it.
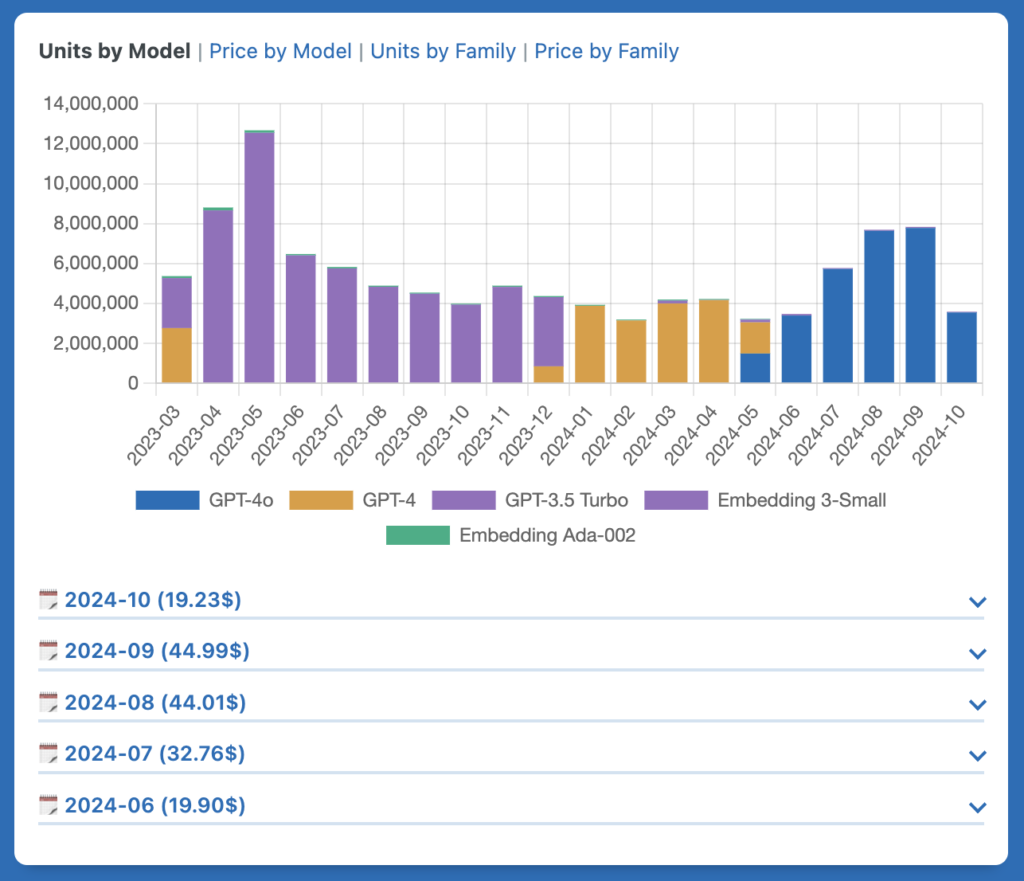
Statistics (Pro)
With the Pro Version of AI Engine, you can enable Statistics in the Server Modules section. Once enabled, a new Queries tab will appear, showing every request made via AI Engine. For each query, you can see (or sort / filter) details like the Scope (source), User, Model, Tokens, Price, and additional metadata. Clicking on a query will display the full data that was sent and received.
Since this data takes up space in your local database, you’ll need to enable Queries Data in the Statistics section of the Settings tab to store it. You can also enable Queries Form Data to track all parameters users input into your AI Forms. This data is neatly organized in your local database, allowing you to perform detailed analysis or create dashboards—giving you endless possibilities.
Limits (Pro)
Limits in AI Engine help you manage and restrict usage, acting as a safeguard to prevent too many queries from running, which can help avoid user errors or problematic code. You can find these settings in the Query tab, where you can set limits for Users, Guests, and the entire System.
If you’re just starting out, it’s recommended to use limits based on the number of queries. For example, setting a system-wide limit of 100 queries per day can prevent excessive usage and potential issues. However, be cautious when setting limits based on price, as pricing can vary depending on the AI services and models you’re using. It’s always better to thoroughly test your setup before using it in production, especially when considering cost-related limits.
AI Engine provides flexibility, allowing you to customize limits based on your specific needs. For more complex systems, you may need development skills or the help of a developer. AI Engine offers a range of WordPress filters that you can modify, making it easier to create a tailored limit system that fits your requirements.
Don’t forget to check the docs to learn more! 🙂